Create an account and sign in
This procedure covers a first registration in the UbID Credential Issuer and the next sign-in from the same browser.
The supplied screenshots show the English interface. The position and purpose of the controls are the same when you select Spanish or Portuguese from the language menu.
Before you begin
Have the following available:
- A mobile phone that can receive SMS messages.
- An email account you can open during registration.
- A current browser on the device you will normally use with UbID.
- A new password that you do not use on another service.
Do not share an SMS code, email verification link, or password with another person, including someone claiming to be UbID support.
Create your UbID identity
1. Open registration
Open the UbID access page. On a new browser, the local identity list can be empty, as shown below. Select Register here at the bottom of the access panel.
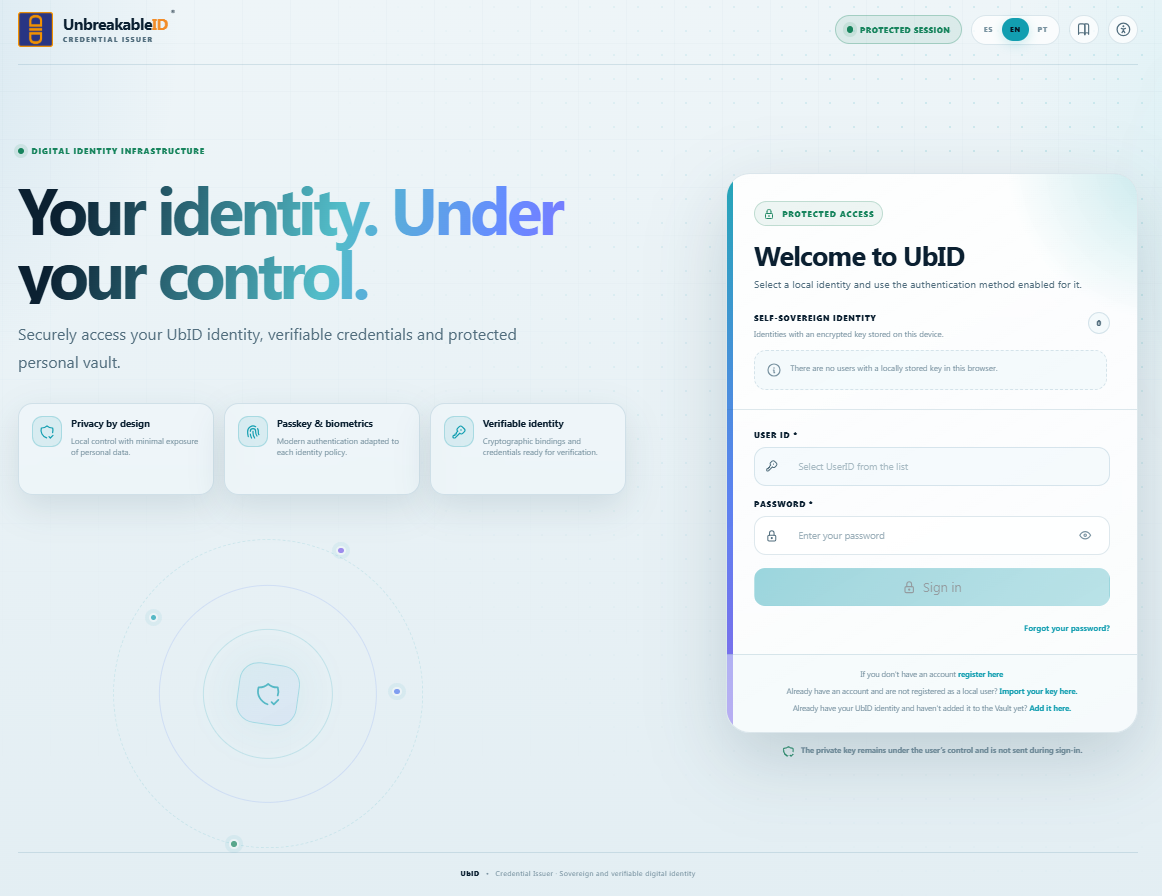
Initial access page when this browser does not yet contain a local UbID identity.
2. Complete the registration form
The fields marked with an asterisk are required.
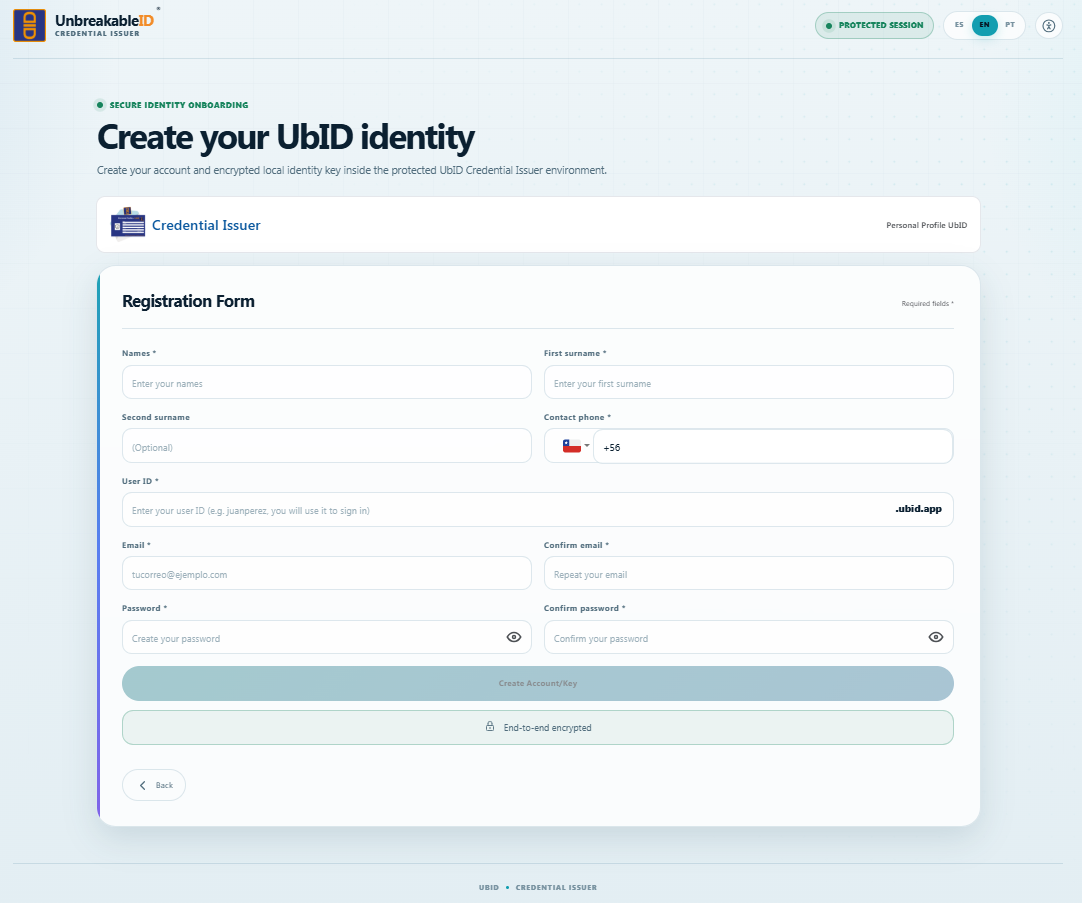
Registration form. The Create Account/Key button is enabled after all required values are valid.
| Field | What to enter | Validation and recommendations |
|---|---|---|
| Names | Your given name or names. | Between 2 and 50 characters. Use letters, spaces, hyphens, or apostrophes. Accented letters are accepted. |
| First surname | Your primary or first family name. | Required; between 2 and 50 characters with the same character rules as Names. |
| Second surname | Your second family name, when applicable. | Optional; up to 50 characters. Leave it empty if it does not apply. |
| Contact phone | Select the country flag/code and enter a valid mobile number. | Use a number you can access immediately. UbID sends an SMS verification code to it. |
| User ID | A unique identifier that you will use to sign in; for example, juanperez. | Enter only the part before .ubid.app. Use 3–99 lowercase letters, numbers, periods, or underscores. It must begin and end with a letter or number. UbID displays the final identifier with the .ubid.app suffix. |
| An active email address you control. | Up to 100 characters. It is used to activate the account and deliver the invitation to add the basic credential to the Vault. | |
| Confirm email | Enter the same email again. | It must match Email exactly. |
| Password | A new password for the UbID account. | Between 8 and 80 characters, with at least one uppercase letter, one number, and one symbol. |
| Confirm password | Enter the same password again. | It must match Password exactly. Use the eye button only when nobody else can see your screen. |
Review the information and select Create Account/Key. The button remains disabled while a required field is empty or invalid.
3. Correct an identifier or email already in use
UbID checks that the User ID and email are not already associated with another account. If the email is already registered, select Accept, enter another email and confirm it again.

The registration cannot continue with an email that is already associated with a user.
If the User ID is already registered, return to the form and choose another one. Do not add .ubid.app manually.
4. Verify the phone by SMS
Phone verification is completed before UbID sends the email verification.

SMS verification dialog associated with the newly created User ID.
- Confirm that the User ID shown in the dialog is yours.
- Select Send SMS code.
- Open the SMS received on the registered phone.
- Enter the code in SMS verification code.
- Select Verify phone number.
If the code is rejected or has expired, request a new SMS and use only the most recent code. Do not close the process until the application confirms that the phone was verified.
5. Activate the account from your email
After the phone is verified, UbID sends a verification message to the registered email address.
- Open the inbox for that email account. Check the spam or junk folder if the message is not visible.
- Confirm that the message refers to the User ID you just registered.
- Follow the verification instruction in the message to activate the account.
- Keep the message until you finish adding the UbID Basic Credential to the Vault; the same communication also invites you to complete that step.
Use only the activation message generated by your own registration. Never forward the verification link or code.
Add the UbID Basic Credential to the Vault
Once registration is complete, UbID shows that the identity is ready and offers the next Vault step.
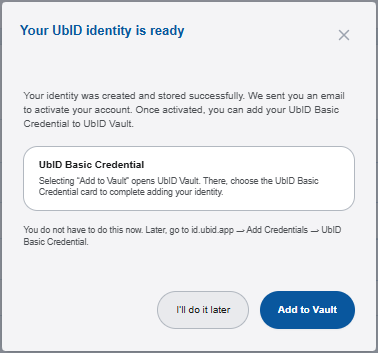
You can continue to the Vault immediately or postpone the operation.
- Activate the account from the email before completing issuance.
- Select Add to Vault. UbID opens the Vault.
- If this device does not yet have a Vault access method, complete the requested access setup.
- Select the UbID Basic Credential card.
- Review the issuer and credential information, continue through authorization, and accept the credential at the final consent step.
If you select I’ll do it later, you can resume from Add Credentials → UbID Basic Credential in the Vault.
Sign in with a password
After registration, the identity is available in the local identity list of the same browser.
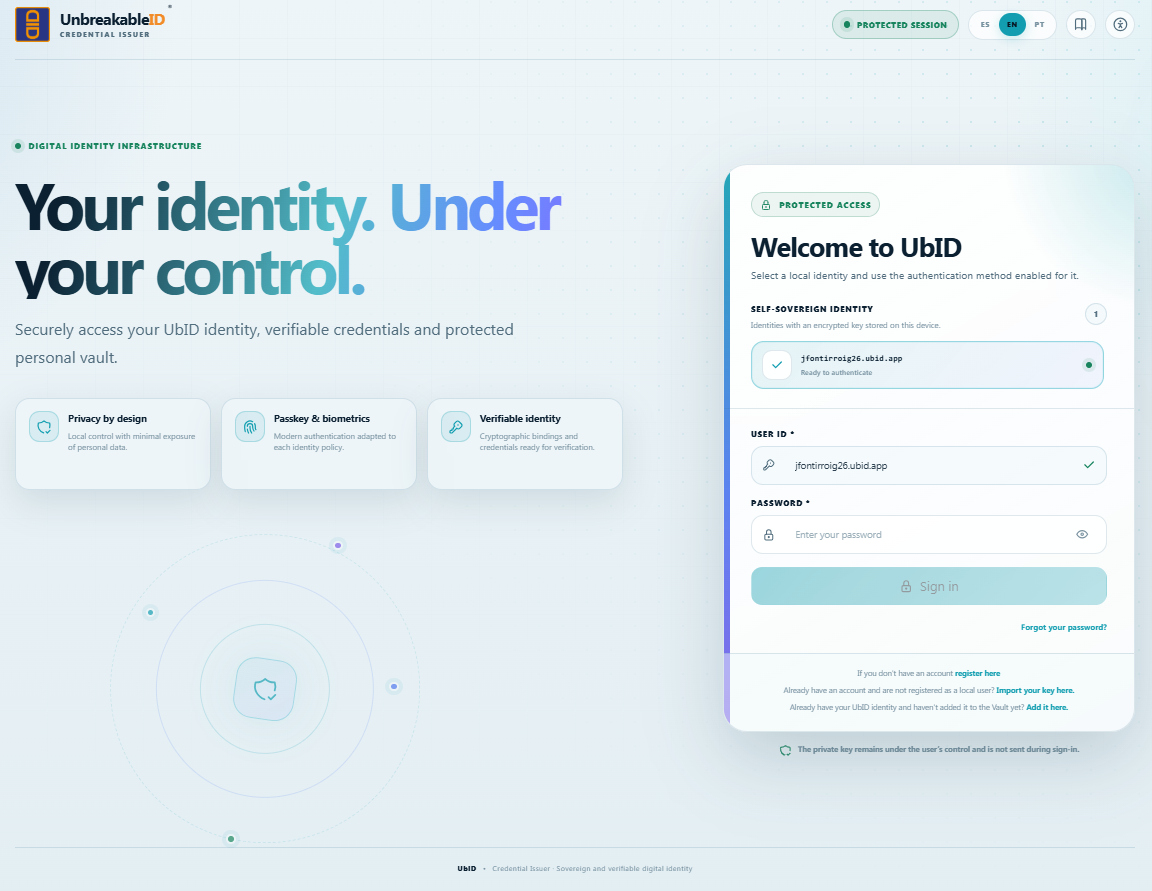
The selected local identity is ready to authenticate.
- Open the UbID access page.
- Select your identity from Self-sovereign identity.
- Confirm that User ID shows the expected identifier.
- Enter the account password.
- Select Sign in.
- Complete an additional SMS or FaceTec verification only if the active identity policy requests it.
If the identity does not appear in the local list, do not register it again. Use Import your key here or the applicable recovery procedure in Local keys, backup, and recovery.
Sign in with a fingerprint or passkey
If this access method was previously enabled, select the identity and choose Sign in with fingerprint/passkey. Follow the operating-system prompt for fingerprint, Face ID, Touch ID, Windows Hello, device PIN, or a security key.
Reset a forgotten password
Select Forgot your password? on the sign-in page and follow Reset a forgotten password. The dedicated guide covers the registered-email check, the secure link, the new-password fields, and the possible relationship with local-identity recovery.