Present and authorize credentials
After starting verification in the client application, Verifier displays a QR code and an Open with UbID Vault button.
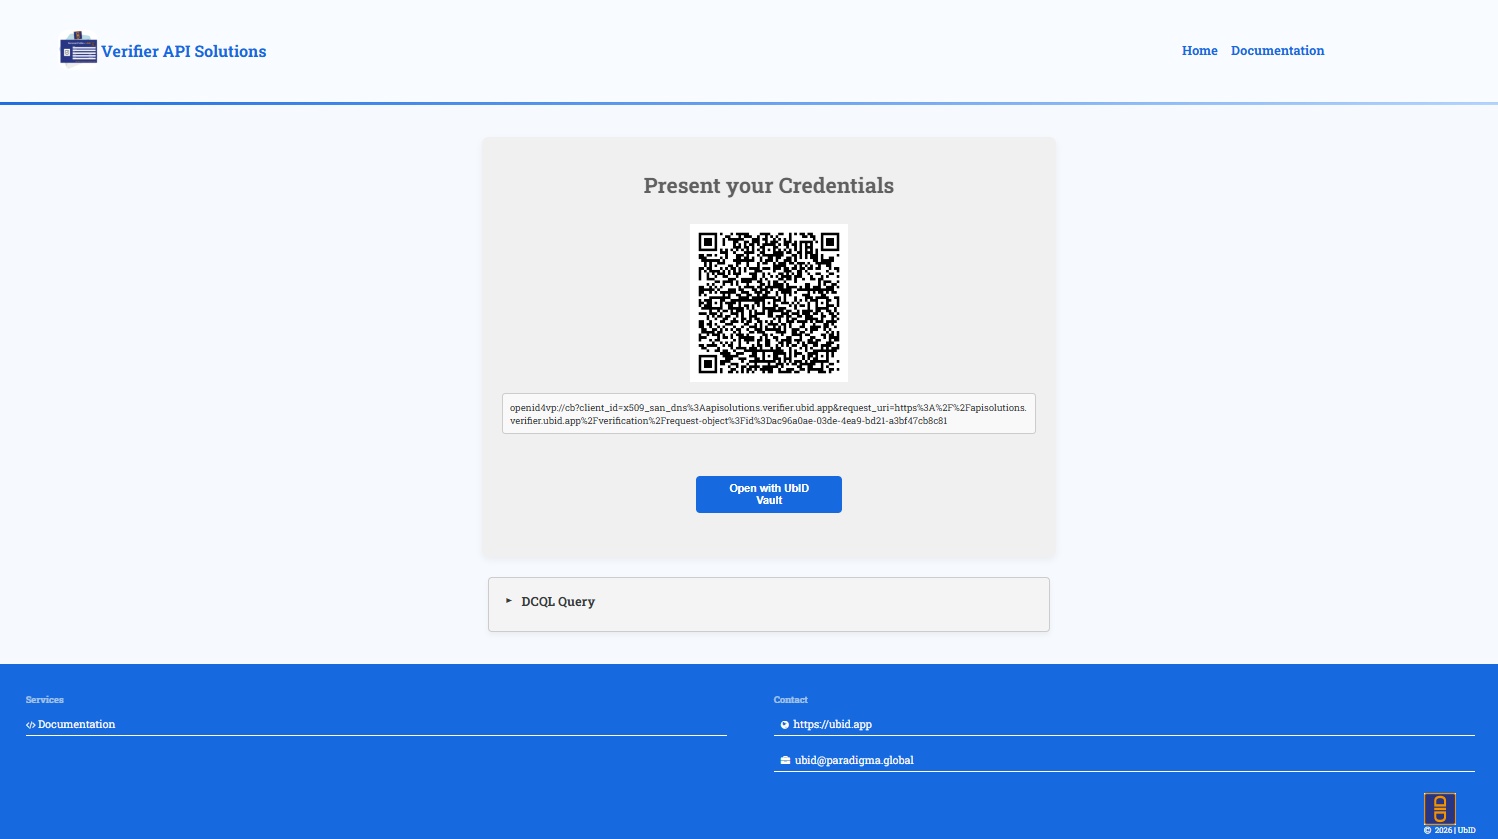
1. Open the request
- On the same device: select Open with UbID Vault.
- On another device: open Vault on the device holding your credential and scan the QR code.
The long text below the QR code is the OpenID4VP request URI. Do not copy or send it to another person. It is linked to the verification transaction and may expire.
The expandable DCQL Query section is technical information describing the requested credential and fields. Ordinary users do not need to edit it.
2. Review the request preview
Vault first shows the requesting party, stated purpose, and requested credential or claims.
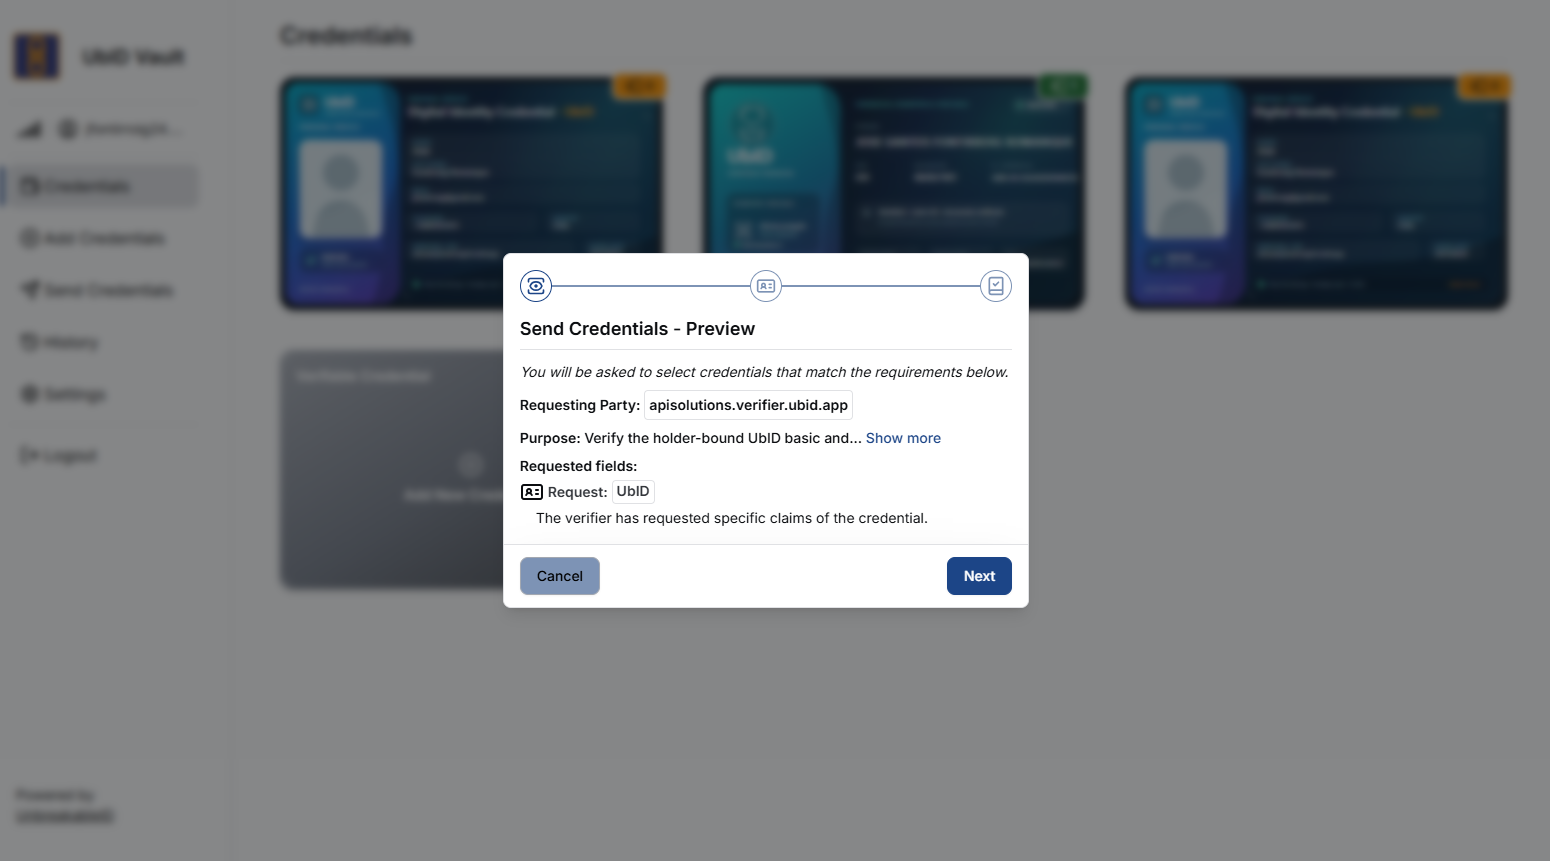
- Verify Requesting Party. In this example it is
apisolutions.verifier.ubid.app. - Read the complete Purpose using Show more when necessary.
- Review the requested credential and fields.
- Select Next to look for a matching credential, or Cancel to stop.
3. Wait for compatible credentials
Vault evaluates the credentials in the current account against the request. While a credential is being loaded or checked, it can appear dimmed and Next remains unavailable.
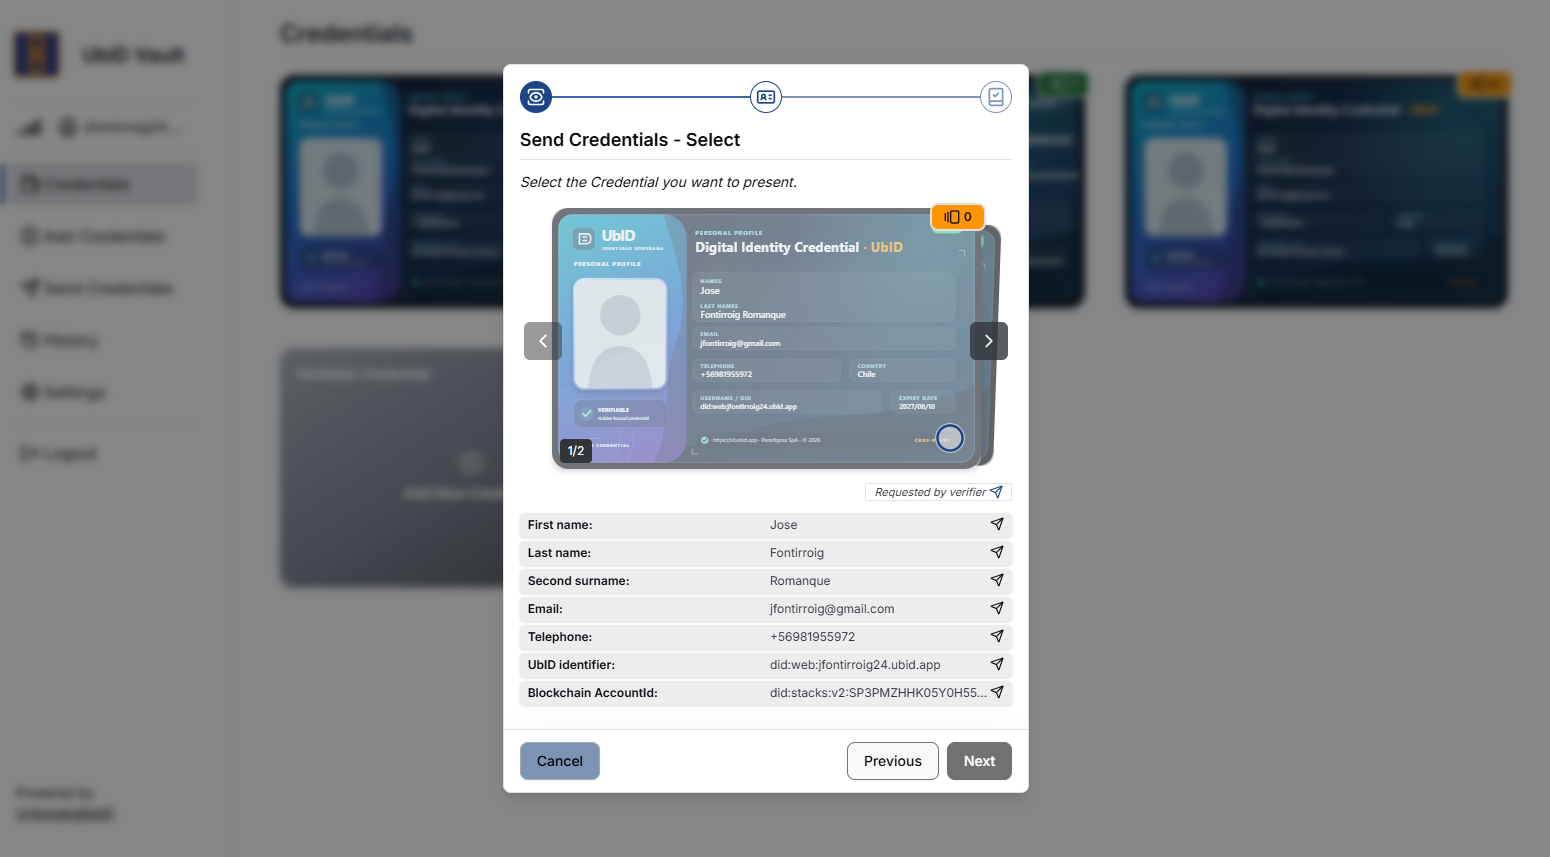
Wait for the check to complete. If no compatible credential becomes selectable, confirm that you opened the correct Vault account and that it contains the credential type requested by the service.
4. Select the credential and fields
Choose the credential you want to present. A check mark confirms the selection and enables Next.
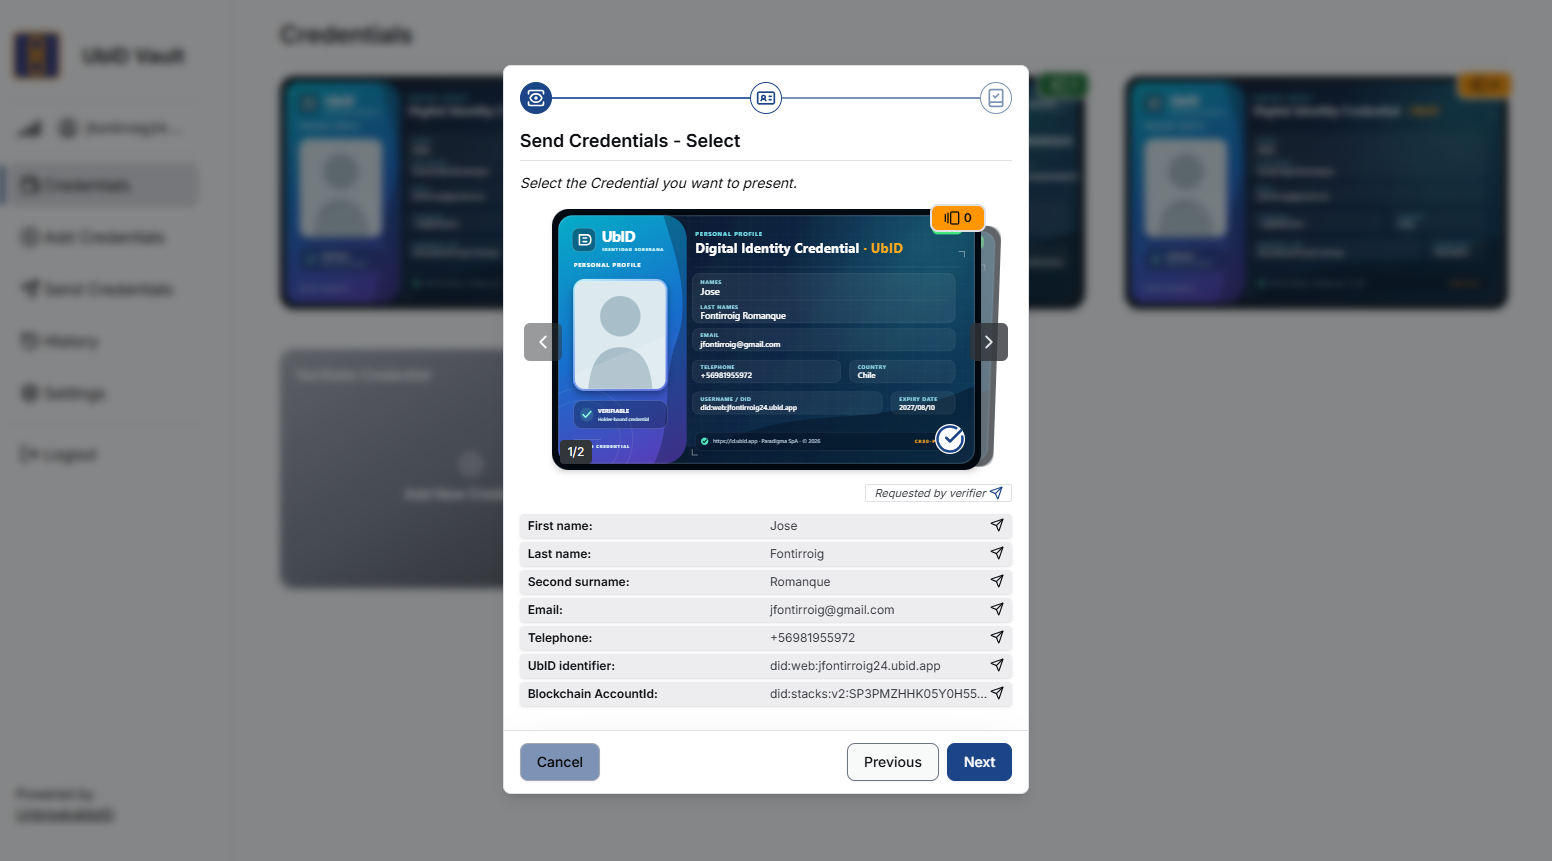
- Use the left and right controls when more than one compatible credential is available.
- Confirm the issuer, holder, validity, and credential type shown on the card.
- Review every field listed below the card. The Requested by verifier indicator identifies data included in the request.
- Do not continue if an unexpected attribute is listed.
The credential data in these screenshots are examples. Do not use screenshots containing real identity data for support unless the approved support process explicitly requires it.
5. Confirm and send
The summary is the final authorization screen. It states that only the listed fields will be shared from the selected credential.
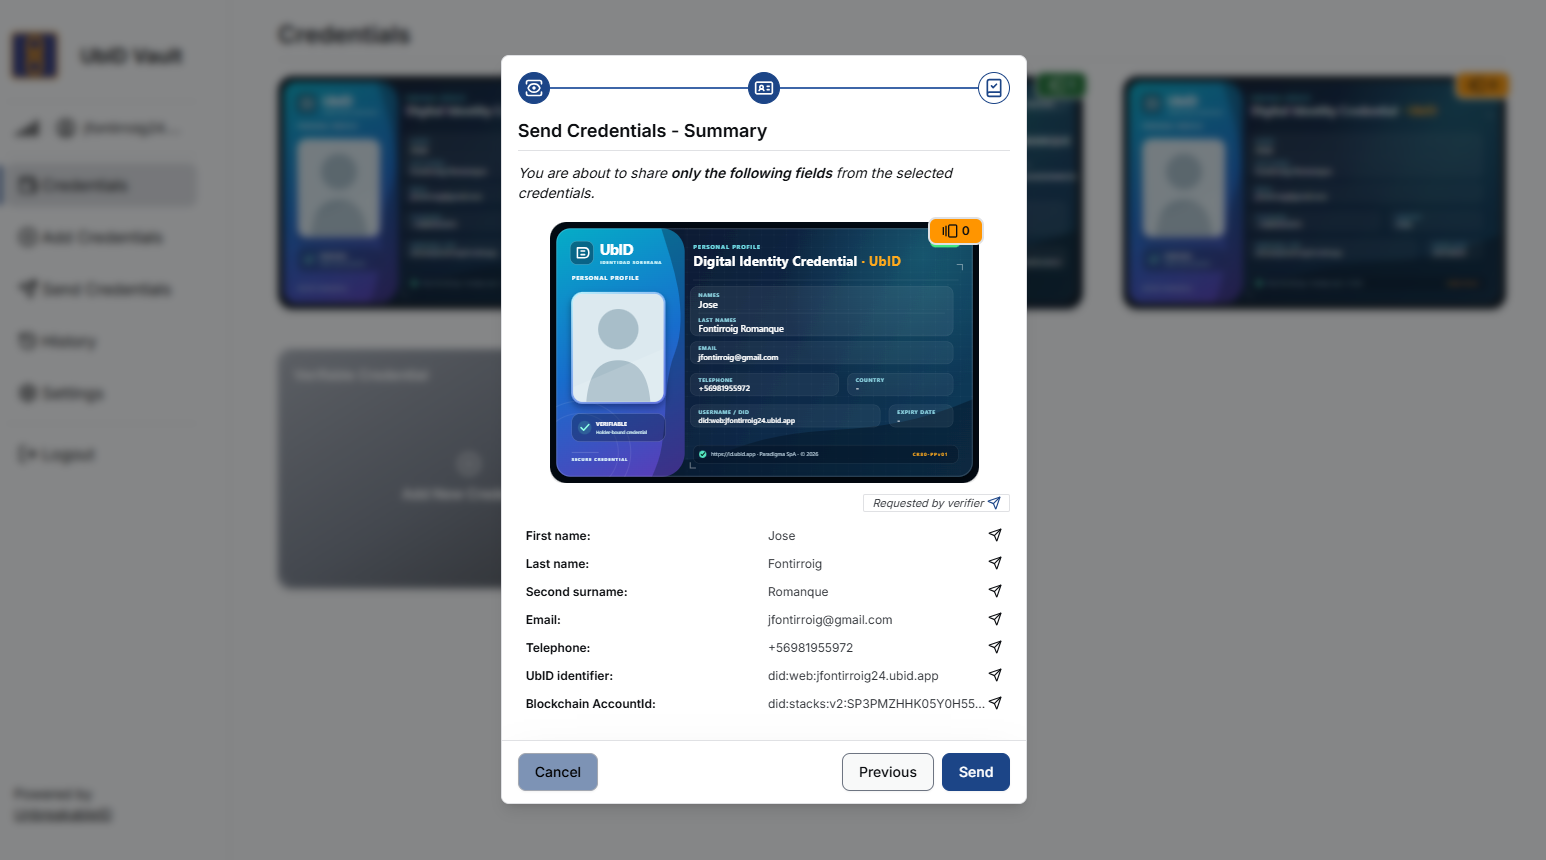
- Recheck the credential and disclosed fields.
- Select Previous to change the selection.
- Select Send to authorize this presentation.
- Select Cancel to leave without presenting the credential.
Authorizing a presentation does not transfer the credential itself into the client application and does not remove it from Vault. Vault creates the proof required for this transaction; the holder's private key remains protected.
Continue with Verification result and client session.